Shopify Framer Integration: How to Sell Shopify Products on Framer
 Anika Anamta Mehnaz17 min read
On this page
- Key takeaways
- Can you use Shopify with Framer?
- What to check in Framer first
- Way 1: Shopify’s Buy Button
- How to add a Shopify Buy Button to Framer
- Where the Buy Button falls short on Framer
- Way 2: a sync plugin like Framer Commerce
- Way 3: a buy button plugin like Shopify Sellflow
- Way 4: an embed app like EmbedUp
- How to add Shopify products to Framer with EmbedUp
- What EmbedUp adds that the Buy Button doesn’t
- Adding products to Framer blog posts
- What EmbedUp won’t do
- How the cart and checkout work in each way
- What each way costs
- What updates by itself, and what you redo by hand
- Which way should you choose?
- Three example setups
- A skincare brand launching a new serum
- A design studio selling prints
- A podcaster selling one tote bag
- Does selling on Framer help or hurt SEO?
- Launch checklist for Shopify on Framer
- Common mistakes when selling Shopify products on Framer
- 1. Testing only in the canvas
- 2. A fixed height that’s too short
- 3. Pasting HTML into CMS text
- 4. Two prices in two places
- 5. Choosing a sync plugin for a one-page launch
- Using EmbedUp on Framer and other sites
- Ready to sell from your Framer site?
- Frequently asked questions
Framer doesn’t take payments itself, so to sell Shopify products on a Framer site you connect the two: paste Shopify’s free Buy Button into a Framer Embed, sync products with a plugin such as Framer Commerce, or place a styled product block with an embed app like EmbedUp. In every option, Shopify still runs the cart, checkout, stock and orders, while Framer runs the page.
Which one fits depends on how much of your store should live in Framer. If Framer is your whole shop, a sync plugin makes sense. If Framer is where you launch, tell stories and publish content, an embed is faster and cheaper. This guide compares the options on cost, setup and upkeep, and walks you through each one.

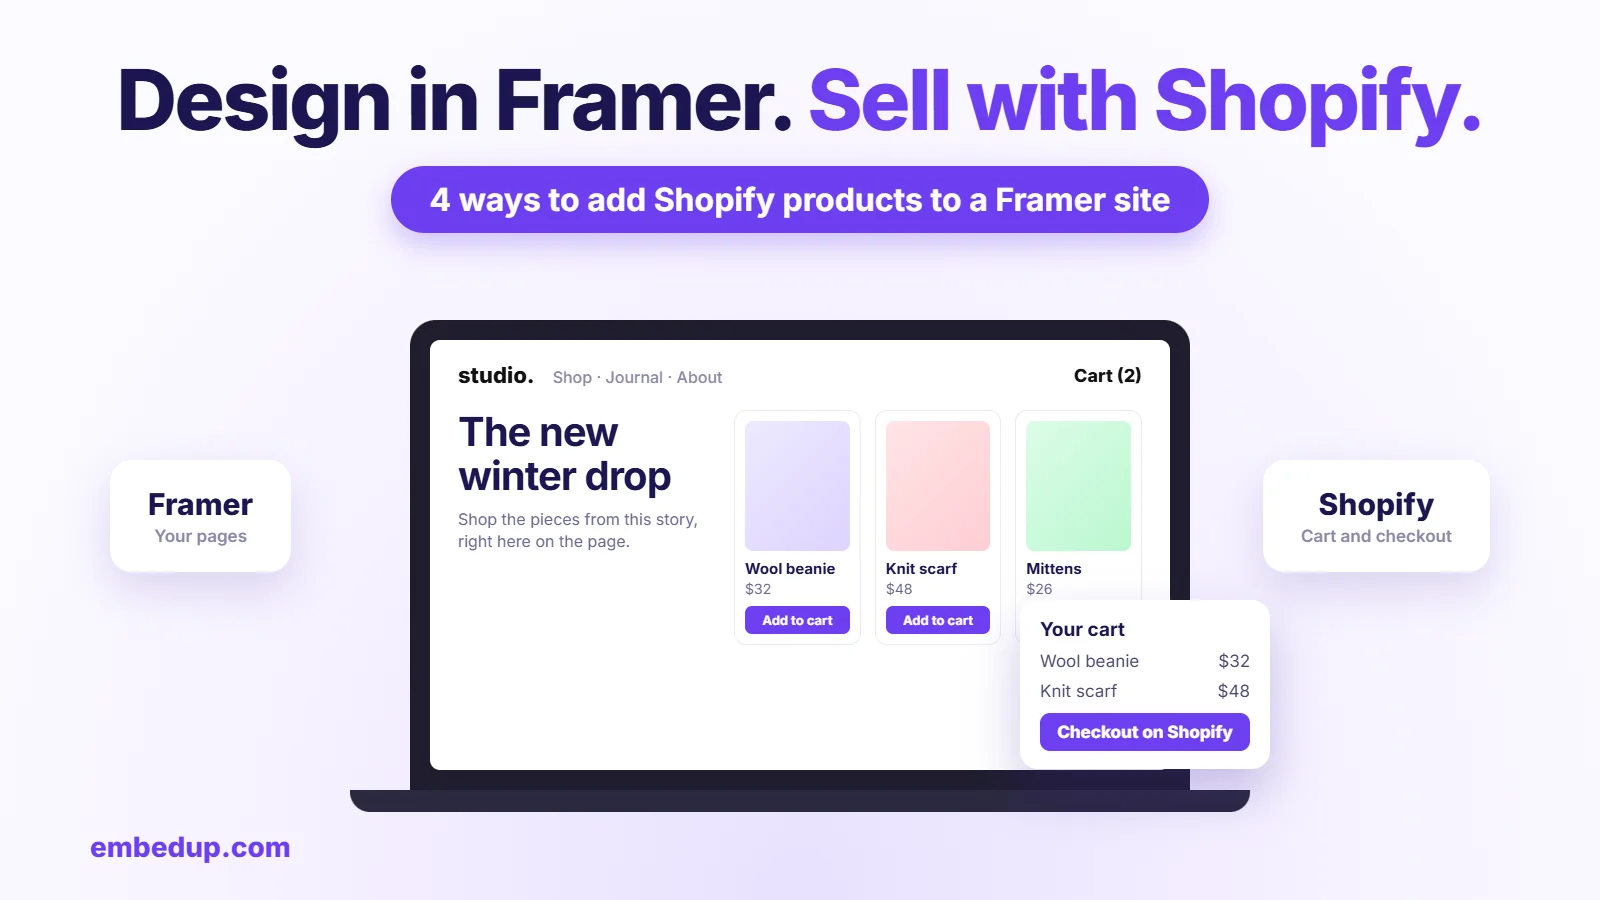
Four ways to connect Shopify and Framer, compared
Key takeaways
Framer has no built-in checkout. Its help center says Framer doesn’t process payments, so selling needs Shopify or another checkout.
Framer’s Embed component takes a URL or HTML. That’s where a Buy Button or an EmbedUp code goes.
Framer doesn’t load custom code in the canvas preview. Always test on the published site.
A custom domain needs a paid Framer plan. Basic is $10 a month and Pro $30 a month on Framer’s pricing page.
Framer Commerce syncs Shopify products into Framer CMS and starts at $12 a month for a live store. Shopify Sellflow adds buy buttons for a one-time $29 or $59.
EmbedUp’s free plan covers 1 component with up to 3 products. Custom CSS is on Growth ($14.99 a month). Framer isn’t named on its listing, so test the code on your published page first.
Write product names and descriptions as normal Framer text next to any embed. Embedded content loads with JavaScript, so search engines may not read it as part of your page.
Can you use Shopify with Framer?
Yes. Many brands do: Framer for the site, Shopify for selling. Framer is popular with designers because it builds fast, animated sites without code. Shopify has the checkout, payments, taxes, shipping and order tools that Framer doesn’t.
What’s missing is a one-click “Shopify for Framer” button from either company. Framer’s Shopify lesson in Framer Academy uses Framer Commerce, a third-party plugin, and notes that third-party integrations may need a separate subscription and are supported by their makers, not Framer.
So you choose a connector. There are four kinds:
Way | What it does | Where checkout happens |
|---|---|---|
Shopify Buy Button | Shopify’s free button in a Framer Embed | Shopify |
Sync plugin (Framer Commerce) | Copies Shopify products into Framer CMS; you design product pages in Framer | Shopify |
Buy button plugin (Shopify Sellflow) | Adds a product card and buy button from the Framer Marketplace | Shopify |
Embed app (EmbedUp) | Shoppable product blocks, styled to your site, placed with one embed code | Shopify |
There’s a fifth path for developers: build it yourself with Shopify’s Storefront API and Cart API, or with Storefront Web Components. That needs someone who writes and maintains code.
What to check in Framer first
Before you pick a way, check these points. They come from Framer’s help center, Academy and pricing page.
Check | What Framer says | What it means for you |
|---|---|---|
Payments | Framer doesn’t process payments or handle transactions | You need Shopify (or another checkout) for every option |
Embed component | Insert menu, search “Embed”; paste a URL or HTML | This is where buy buttons and embed codes go |
Canvas preview | Framer doesn’t load custom code in the canvas preview | Publish, then test on the live page |
Blocked sites | Some sites block embedding through HTTP headers | If an embed shows blank, check the browser console |
Custom domain | Needs a paid plan (Basic $10/month, Pro $30/month) | A free Framer site can still test, on a Framer address |
CMS size | Basic: 1,000 CMS items; Pro: 2,500 | Matters only if you sync a big catalog into Framer CMS |
One more point for blog sites: Framer’s CMS text and rich text fields are for content, not code, so HTML pasted into a post’s text won’t run (BRIX Templates, January 2026). To put a product block in CMS posts, add the Embed component to the CMS page template, or place it on a normal page.

Framer and Shopify setup checks before you start
Way 1: Shopify’s Buy Button
The Buy Button is a free Shopify sales channel. You create a button for a product or collection in Shopify, copy its code, and paste it into Framer.
How to add a Shopify Buy Button to Framer
In Shopify, add the Buy Button sales channel from the Shopify App Store.
Create a Buy Button. Choose a product or collection and set the style.
Copy the code.
In Framer, open the Insert menu, search for Embed, and drag it onto the page.
Paste the code into the Embed’s HTML field. Resize the Embed so the button has room.
Publish the site and test the button on the live page.
Where the Buy Button falls short on Framer
It won’t match your design. The button and its cart run in an iframe, so your Framer fonts and styles don’t reach them.
Restyling means new code. To change the look, you make a new button in Shopify and paste the new code everywhere.
Sizing takes trial and error. The Embed has a fixed frame in Framer, and the cart pop-up needs room. Check it on phone, tablet and desktop.
Each product is manual. Showing 12 products means 12 buttons or a collection button with Shopify’s layout.
Choose the Buy Button if you sell one to five products, don’t mind Shopify’s look, and want to pay nothing extra.
Way 2: a sync plugin like Framer Commerce
A sync plugin brings your Shopify products into Framer CMS. You then design product cards, collection pages and product pages in Framer, using the synced data. The cart and checkout still run through Shopify.
Framer Commerce is the plugin Framer’s own Academy lesson uses. It won a Framer Best Plugin Award, according to its Framer Marketplace listing (last updated 10 November 2026). The listing describes:
One-click sync of products, variants, prices, descriptions, tags, collections and SEO data into Framer CMS.
Add to Cart, Quick Add, Buy Now and Shop Pay buttons, a live cart counter and a cart overlay.
Localized checkout tied to Shopify Markets.
Subscription selling plans, variant selectors, filters and search.
Cost: free to start building, with a Framer Commerce badge and a Framer domain. To go live, framercommerce.com lists Framer Commerce from $12 a month, on top of your Framer and Shopify plans.
Setup: Framer’s Academy lesson walks through creating a Shopify app and access token, building a CMS collection for products, adding the Shopify wrapper and cart, then publishing and testing. Expect hours, not minutes, because you design the store yourself.
Choose a sync plugin if your whole store lives on Framer: product pages, collection pages, filters and search. Check that your catalog fits your Framer plan’s CMS item limit.
Way 3: a buy button plugin like Shopify Sellflow
Some Framer plugins sit between the two. Shopify Sellflow, by KDX Studios, adds a product card with live price, image and variants, plus a buy button that creates a Shopify cart and sends shoppers to Shopify’s checkout.
Its Framer Marketplace listing shows a free demo button and a one-time Pro license: $29 for personal projects and $59 for client work. Pro connects your own store with your store domain, a public Storefront API token and a product handle. It also adds conversion pixels and sale pop-ups.
Choose a plugin like this if you want a styled buy button for a handful of products, are comfortable creating a Storefront API token, and prefer a one-time fee.
Way 4: an embed app like EmbedUp
An embed app places shoppable product blocks on any page, styled to match your site. EmbedUp creates a “component” (one product, several products, chosen variants or a collection) and gives you one embed code. Prices, variants and stock come from your Shopify store, so you don’t update the page when a price changes.
This fits Framer sites that sell from content: a launch page, a lookbook, a “shop the look” section, a recipe, or a partner’s site. You don’t build product pages in Framer. You add buying where people already are. See how to sell Shopify products outside your store for more places this works.
One honest note: EmbedUp’s App Store listing names WordPress, Webflow, Wix and landing pages, not Framer. The embed code is standard HTML, which is what Framer’s Embed component accepts, but test it on your published Framer page before you send traffic to it.
How to add Shopify products to Framer with EmbedUp

Add Shopify products to Framer with EmbedUp in 7 steps
Install EmbedUp from the Shopify App Store. The free Starter plan covers 1 component with up to 3 products.
Create a component. Choose products or a collection, and pick specific variants if you want to.
Style it to match your Framer site. Set the layout (grid, list or slider), button colors, font size and corner radius. On Growth ($14.99 a month), add custom CSS to use your Framer fonts and spacing.
Choose how it adds to cart. Pick individual add to cart, or add all to cart for sets and kits (Growth).
Copy the embed code from the component editor.
Paste it into Framer. Open the Insert menu, drag an Embed where the products should appear, and paste the code into its HTML field. Give the Embed enough height for the layout you chose.
Publish, then test on the live site. Add a product, open the cart and go through to Shopify’s checkout. Check it on a phone too.

EmbedUp component editor for a Shopify product block
What EmbedUp adds that the Buy Button doesn’t
Styling you control, including custom CSS on Growth, so the block looks like the rest of your Framer page.
A cart drawer on your site, so shoppers review the cart before going to checkout.
Add all to cart and preset bundles for sets and kits (Growth), with an inventory check before checkout.
Affiliate and UTM tracking on Pro ($29.99 a month), so you can see which page or partner sold what.

EmbedUp cart drawer on a site outside Shopify
Adding products to Framer blog posts
Many Framer sites have a blog built on Framer CMS, and a post is a natural place to sell: a “best gifts for runners” list, a recipe, a how-to. Because CMS text fields don’t run HTML, you have two practical choices:
One block for every post. Add the Embed to the blog post template, below the article, with a general component such as your best sellers. Every post shows it, and you manage it in one place.
Different products per post. Make a component for each post in EmbedUp, then add a plain text field to your Framer CMS collection and connect the Embed to it. BRIX Templates describes this pattern for unique embeds per CMS item, and suggests hiding the Embed when the field is empty. Test one post on the live site before you roll it out.
If you only have a few selling posts, a simpler route is to build those as normal Framer pages with the Embed placed by hand. For ideas on what to write, see our guide to monetizing a blog with Shopify products.
What EmbedUp won’t do
EmbedUp won’t turn Framer into a full store with product pages, collection pages and filters. For that, use a sync plugin or a Shopify theme. Paid plans have a 5-day trial, so plan your Framer test before you start it.
If you’re comparing embed tools, our 7 checks for choosing a Shopify embed app is a good list to run through.
How the cart and checkout work in each way
Shoppers care about one thing: does buying feel safe and simple? In every option, payment happens on Shopify’s checkout, so your payment methods, taxes, shipping rates and discount codes work as they do in your Shopify store. The difference is what happens before checkout.
Buy Button: the shopper adds to a Shopify cart that opens over your page, then goes to checkout. The cart looks like Shopify, not your site.
Framer Commerce: you design the cart with the plugin’s components, then hand off to Shopify’s checkout.
Shopify Sellflow: the button creates a Shopify cart and sends the shopper to Shopify’s checkout.
EmbedUp: the shopper adds products to a cart drawer on your Framer page, reviews it, then checks out on Shopify.
Because orders land in Shopify, your stock, fulfillment apps and reports keep working. You don’t run two order systems.
What each way costs
All four options need a Framer plan for a custom domain and a Shopify plan. The difference is the connector and your time.

Shopify on Framer: cost and setup effort compared
Buy Button | Framer Commerce | Shopify Sellflow | EmbedUp | |
|---|---|---|---|---|
Framer plan | Basic $10/month or higher | Basic or higher (check CMS limits) | Basic or higher | Basic $10/month or higher |
Connector price | Free | Free to build; from $12/month to go live | Free demo; $29 or $59 one time | Free (1 component); $14.99 Growth; $29.99 Pro |
Shopify setup | Buy Button channel | Access token, Storefront API token | Storefront API token | Install the app |
First product live (our estimate) | About 30 minutes | Hours (you design the pages) | About 30 minutes | About 15 minutes |
Change the look | New button and new code | Design in Framer | In Framer | In the component editor |
Prices are monthly in US dollars before tax unless marked one time, from each listing or pricing page on 17 November 2026. Setup times are our estimates for someone who isn’t a developer.
What updates by itself, and what you redo by hand
When this changes | Buy Button | Sync plugin | EmbedUp |
|---|---|---|---|
A price in Shopify | Updates | Updates on the next sync | Updates |
A new variant | Updates | Updates on the next sync | Updates |
A new product to show | New button or collection button | Syncs as a new CMS item | Add it to the component |
The style | New button and new code | Your Framer design | Component editor |
Which way should you choose?

Which Shopify Framer setup fits your site
Framer is your whole store (product pages, collections, filters): use a sync plugin like Framer Commerce, or move the store to a Shopify theme.
You sell from content (launch pages, lookbooks, blog posts, partner sites): use an embed app like EmbedUp.
You sell one to five products and don’t mind Shopify’s styling: start with the free Buy Button.
You want a styled button for a few products and a one-time fee: try a buy button plugin like Shopify Sellflow.
You have a developer and want full control: build with the Cart API or Storefront Web Components, and budget for upkeep.
Three example setups
These are made-up examples, not customers. They show how the choice changes with the kind of site.
A skincare brand launching a new serum
The brand’s main store runs on a Shopify theme. For the launch, their designer builds a Framer page with scroll animations and before-and-after photos. Best fit: an embed app. One component with the serum in two sizes sits in the middle of the page and again at the bottom. When the launch price ends, they change it once in Shopify.
A design studio selling prints
The studio wants every print on its own page, with large photos, filters by color and size, and a cart designed to match. Search traffic to product pages matters. Best fit: a sync plugin, because product pages need to be real Framer pages that Google can index. Budget for a few days of design and the plugin’s monthly fee.
A podcaster selling one tote bag
A podcast site built in Framer sells one tote bag each season and doesn’t care how the button looks. Best fit: the free Buy Button. If they later add a mug and want a matching look, they can move to an embed app.
Agencies building Framer sites for Shopify clients face the same choice for each client. An embed app is often the easiest to hand over, because the client manages products in Shopify and the product block in the app, and the agency only places the code once. For a launch, see our guide to embedded Shopify products for product launch campaigns.
Does selling on Framer help or hurt SEO?
Framer sites can rank well: they’re fast, and you control titles, descriptions and URLs. How you add products affects what search engines see.
Embeds and Buy Buttons load products with JavaScript after the page loads. Your Framer text, headings and images stay on the page, but product details inside the embed may not be read as part of it. Write the product name and a short description in normal Framer text next to the embed.
Sync plugins put product data into Framer CMS, so product pages are real pages with their own URLs. That’s better if you want product pages to rank.
Your Shopify store keeps its own product pages. If the same products are on both, decide which pages should rank and link to them clearly.
The same goes for AI search answers: tools that summarize pages read your words more easily than a product widget. A clear sentence such as “The Sea Salt serum costs $34 and ships in 2 days” helps both.
Launch checklist for Shopify on Framer
Run this before you share the page or spend on ads. Our BFCM embed QA checklist has a longer version.

Shopify on Framer launch checklist
Publish the Framer site. Custom code and embeds won’t run in the canvas.
Open the live page on a phone. Check the embed’s height, the button size and the cart.
Add to cart and reach checkout. Make sure the right product, variant and price arrive in Shopify’s checkout.
Try a discount code at checkout, if you plan to use one.
Check a sold-out variant. It should show as sold out, not let the shopper pay.
Place a real test order and refund it. Check it lands in Shopify with the right items.
Check your tracking. If you use UTM links or affiliate tracking, confirm the order shows the source.
Write the product text next to the embed for search engines and AI answers.
Common mistakes when selling Shopify products on Framer
1. Testing only in the canvas
Framer’s canvas doesn’t run custom code, so an embed may look blank or broken there. That’s normal. Test on the published page.
2. A fixed height that’s too short
The Embed component has a set size in Framer. If it’s too short, the product grid or the cart gets cut off, often only on phones. Check every breakpoint.
3. Pasting HTML into CMS text
Framer CMS text fields don’t run code. Use the Embed component on a page or the CMS template instead.
4. Two prices in two places
If you type a price into Framer text and also show it in the embed, they’ll drift apart the first time you change it in Shopify. Let the embed show the price, and describe the product in your text without the number, or update both at once.
5. Choosing a sync plugin for a one-page launch
Syncing your whole catalog into Framer CMS is a lot of setup for one launch page. Use an embed for launches, and save the sync plugin for when Framer is your store.
Using EmbedUp on Framer and other sites
If your Framer site is one of several places you sell from, the same EmbedUp component can go on each. For other builders, see our guides to selling Shopify products on Webflow and embedding Shopify products on WordPress. For gift season, a shoppable gift guide built in Framer is a quick win.
A Shopify embed app like EmbedUp lets you start free with one component of up to 3 products, so you can test the whole flow on your Framer site before you pay anything.
Ready to sell from your Framer site?
Start free with one component of up to 3 products, paste it into a Framer Embed, and test the full checkout on your published page. Install EmbedUp from the Shopify App Store.
More from our blog:
Frequently asked questions
Can I connect Shopify to Framer?
Does Framer have ecommerce or a checkout?
Why doesn’t my Shopify embed show in Framer?
Do I need a paid Framer plan to sell Shopify products?
Is a Framer embed bad for SEO?
- shopify embed products
- shopify framer
Related articles
 Embed Shopify Products
How to Sell Shopify Products on a Webflow Site (3 Ways Compared)
Last checked: 10 November 2026, against Webflow's Shopify integration page and Help Center, Shopify's Buy Button and developer docs, and the Shopify App Store listings named below. Who this is for: brands with a Shopify store and a Webflow site, and agencies who build Webflow sites for Shopify merchants. Reading time: about 15 minutes.
16 min read
 Embed Shopify Products
How to Make a Shoppable Holiday Gift Guide Readers Can Buy From
Last checked: 2 November 2026, against the EmbedUp App Store listing, embedup.com, ShipStation's 2026 holiday shipping deadlines, and the NRF 2026 holiday forecast. Who this is for: Shopify merchants, bloggers, and content teams who publish a holiday gift guide on a blog or website. Reading time: about 16 minutes.
17 min read
 Embed Shopify Products
How to Make Money From a Makeup Blog With Shopify (2026 Guide)
Learn how beauty bloggers can turn makeup tutorials, reviews, and product recommendations into earning opportunities. Discover five common challenges of selling Shopify products through blogs and how EmbedUp helps merchants and bloggers create shoppable content, manage affiliate partnerships, and track sales.
16 min read